

Last week on Linkedin I posted about the ‘learning how to set up a webcam up professionally’ journey for The Marketing Meetup Webinars.
Over the weekend I received a series of questions from folks who are on a similar journey of upgrading their webinar set-up. Rather than rewrite war and peace, I’m going to share what I’ve learned here.
How to use a Camera/DSLR as a webcam
As a preview, below is what the set up looks like at the moment.
Yes, it’s a bit of a mess. Yes, all webinars from The Marketing Meetup are presented from atop a tumble dryer 😂

Now, the best advice I was ever given from my dad was ‘don’t give advice’. This means to say I am not an expert in this! I am, however, happy to share my experience in the hope it adds to your own. It should also be noted at this stage that I have had a lot of help from Baz Richardson of Bravo Creative. Thanks mate 🙂


Table of Contents
- How to use a Camera/DSLR as a webcam
- The equipment
- Lighting
- A nod to set design
- Alternatives to a DSLR camera
- Conclusion
The equipment
A caveat
In the midst of a cost of living crisis, I feel a bit crass speaking about spending money. My intention here isn’t to show off. I, therefore, feel compelled to mention that these purchases have been made over the course of three years and there has been a bunch of repurposing along the way. Neither is it my intention to encourage mindless consumption (there is a great webinar on sustainability in marketing here if you haven’t seen it yet.)
My context is that our weekly webinar schedule is an incredibly important part of how I turn up for the community. Making these ‘the best’ I can is important for the experience of TMM events, but also is a key signal of the quality of the content. Before making any purchases, I’d just encourage you to consider whether it’s right, or important, for your context!
One final thing: later on I also show a couple of alternatives, just so you can see what is available far more cost effectively!
The camera – Canon EOS R camera with SIGMA lens
The best advice I received from Baz about the camera is ‘get the cheapest camera you can get away with, with the best lens you can afford’.


For that reason, I went for the Canon EOS RP with a Sigma 30mm 1:1.4 lens. Well… Baz told me what to do and I did it 🙂
Honestly – I think the lens does a lot of the heavy lifting here, so I think this advice from Baz is really good.
I also had to get a mount adapter to get the lens to fit the camera. It’s worth remembering that not every lens is going to fit every camera.
The camera has a USB-C connection, and as I’m using a Mac, I just needed a USB-C to USB-C cable to hook it up to the laptop. I’ll get onto the software you need later.
Settings wise, I use the ‘out the box’ settings in ‘HDR Movie’ mode. As I say – I’m far from an expert, but it sets me on my way!
Camera battery – Getting a dummy battery and battery pack!
One of the things I encountered early on was that if I was running an hour long webinar – I would soon run out of battery by simply using the battery that came along with the camera.
A dummy battery therefore became a necessity! A dummy battery sits inside your camera and makes the relevant connections, but draws it’s power from an external battery source.
In my case, we had a couple of external battery packs from our travels around the house that did the job perfectly. Mine is pretty old now so it doesn’t look like it’s sold anymore – but this one seems like it would do the job.
My battery pack gives me hours and hours and hours and hours of use of the camera. A big recommendation here!

Software to connect your DSLR as a webcam
Most major providers of cameras have some kind of software that hooks up your camera to your laptop so it is recognised as a webcam. In the case of Canon – it’s their EOS Webcam Utility Software.
In my experience, the software these companies offer has been *just fine* but a little unstable.
For example, the Canon EOS Webcam Utility seems to not play that well with the Apple Mac’s with M1 chips in.
It’s a bit of a bummer, but there are too many combinations of manufacturers and laptops to list here to make any strong suggestions. I would just say *be aware* that you probably have some Googling to come!
When it’s working well however, you will see that you have the option to select your DSLR as a webcam in Zoom 🙂
Tripod
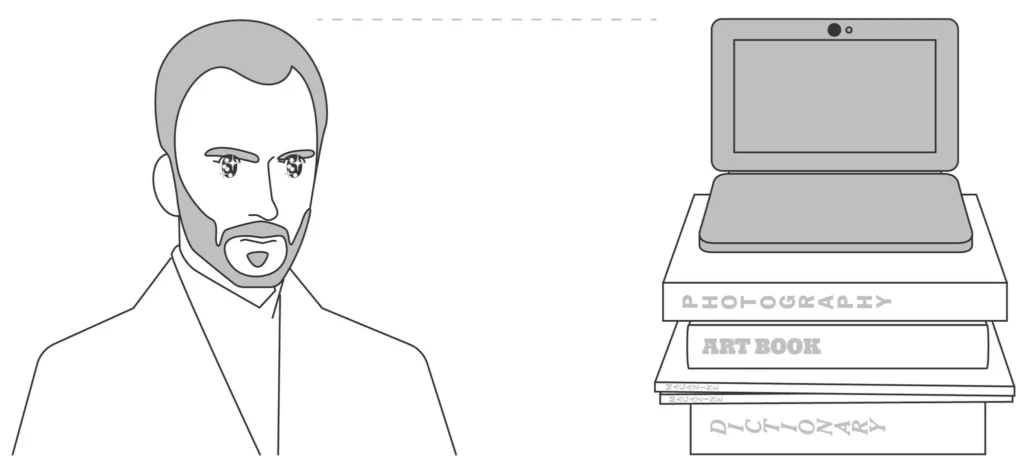
Finally – I have a bunch of tripods to make everything stand up. There isn’t anything fancy here – it’s just about getting things to roughly the right height. On this, I’ll refer to Tom Ford…
Put the computer up on a stack of books so the camera is slightly higher than your head. Say, about the top of your head. And then point it down into your eyes.
How to Look Good on Camera, According to Tom Ford – NY Times
Lighting
I think two things have made the biggest difference to the quality of the image we share in TMM webinars – the lens, and the lighting.


Above you can see two images. One with the lighting set up – another with simply natural lighting.
In the left image you can see that one side of my face is in shadow, and the colours are a bit more washed out. The right photo is a bit warmer, with my full face in the light (although annoyingly there is a reflection in the clock!).
The point I’m trying to make here is even if the camera is good – it’s not the whole game. Lighting really takes you to the next level.
My office looks as below. There is a window to my right as I’m presenting, and then I hang a ring light off the hooks on my door (but you could use a tripod for this!). There is also light that comes from the laptop screen which is a third, weaker light source, but a light source all the same.

Ring light
I use this ring light for our webinars.
Previously, I used the clear filters that came with the light, but decided to switch it to the orange/red filters as I thought I gave the image more warmth – particularly as my room is painted quite a ‘cool’ blue colour which also reflects on me.
I tend to have the ring light on very low setting. You’ll be surprised how much light this provides!
Natural light
Natural light is good, but there are two things you want to be wary of:
- It’s hard to control – The sun goes behind clouds. It pops out again. Both will produce very different lighting scenes.
- It can be very bright when shining directly on you! See my impression of Lord Voldermort below.

For me, the solution has been a simple linen curtain to diffuse any light that is shining on me from the window. It’s thin enough to allow some light through, but thick enough to remove a lot of the variability from the sunshine. Now – I can hear videographers screaming at me – this isn’t the proper way to do things: but the principle is there – diffuse the natural light!
This video explains it much better than I ever could, though:
A nod to set design
Over the years, I’ve played with my office *quite a lot*.
I’m in a place now where I love the space I’m in, but it also works well for our webinars.
One of the questions I got was about the neon sign. That was custom through Neon Vibes but to be honest there are many organisations who create custom neon. Shop around! I wish I had got ours a bit smaller, to be honest.
In any case, the main thing is to think not only about how you are being displayed, but also what is in the background. For me, whenever I go into a Zoom call I’m always having a look at what is in the background – so it’s worth giving this some consideration!


Wistia have a wonderful blog post on set design well worth checking out if you’re looking for tips on how to make your background really stand out!
Alternatives to a DSLR camera
All told, we’re looking at at least a couple of grand for the set up I have proposed, which I appreciate is an awful lot of money – although in the context of TMM, a whole lot cheaper than renting a studio every week for the past three years!
Nonetheless, I also took a couple of stills with alternative webcams to show the difference a DSLR will make when lit the same as a DSLR.
First up is the Razor Kiyo Pro. This is a quite high end webcam – but a webcam (as opposed to a DSLR) all the same. Here you see that the depth of field (the blurry background) has been lost compared to the DSLR which is a big differenciator.
For me, I wouldn’t say this makes a huge difference compared to the image below it which is…

… simply my Mac webcam (which my daughter decided to join me to take the picture for!).
This picture is as basic as it gets. But, let’s be honest – would suffice 99% of the time. For most of us, our expectations are set at this level – so anything better is a pleasant surprise.

Conclusion
So there you have it. That’s what I use and how I set it up: an experience shared. For me, it makes a difference and I like the set up as is. I know I have a long way to go, and much of what I have shared will appear amateur-ish to a pro, but this is about the learning journey, not about being perfect. I hope it helps – and any questions – feel free to drop me a line 🙂 I spend way too much time on Linkedin.